How-To Guides for Alternative Text
The guides on this page provide step-by-step instructions for adding alternative text to images, graphs, and other visual content in learning materials. Guides cover programs that are commonly used by educators to creating learning content in digital formats.
Steps are provided for users who interact with content using a mouse pointer as well as for those users who interact using keyboard commands.
Each guide appears in two formats - HTML and PDF. The PDF handout version is linked at the top of each corresponding accordion tab.
Adding Alt Text to Images in Adobe Acrobat Pro DC
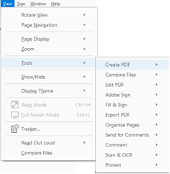
To view the available tools, navigate to the Tools submenu by clicking on View on the menu bar, then click Tools
OR
Press Alt, V, then T.
If Accessibility isn’t available proceed to step 2, if it is available proceed to step 3.
To add Accessibility tool to the Tools submenu, navigate to Manage Tools by clicking on Edit on the menu bar, then click on Manage Tools in the submenu.
OR
Press Alt, E, then M.
Scroll down to the Protect & Standardize section and click Add under Accessibility OR tab down to Accessibility and tab one more time to Add button and press ENTER. Then press ENTERagain to open Accessibility Tools.
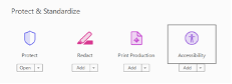
From the View menu, and Tools submenu, click on Accessibility, then Open.

Adding Alt Text to Images in Google Docs
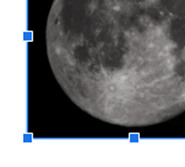
To select the image click on the image OR place cursor to the left of image and press SHIFT + right arrow.
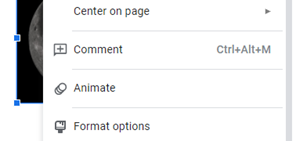
To open the context menu, hover over the image and right-click with the mouse
OR
Press CTRL + SHIFT + \.
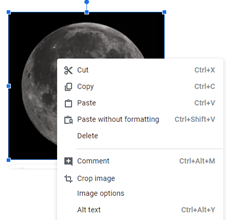
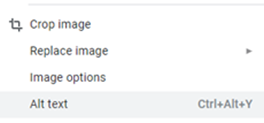
To open the Alt Text window, click to select Alt Text from the context menu
OR
Press CTRL+ALT+Y.
Type a short title and description of the image or its function in the Title and Description box. See Resource List for tips on authoring alternative text.
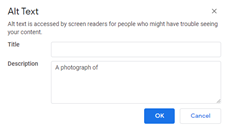
To accept the alt text, click the OK button or press TAB to navigate to the OK button and click ENTER.

Adding Alt Text to Images in Google Slides
Right-click the image to select it and open the context menu.
OR
Press TAB until the image is selected and press CTRL+SHIFT+\ to open the context menu.
Select Alt Text from the menu to open the Alt Text dialog box.
OR
Use DOWN ARROW to move to Alt Text and ENTER to select it. Or, with the context menu closed, press CTRL+ALT+Y.
Type a short description of the image or its function in the Description box. See Resource List for tips on alternative text authoring.

To accept the alt text, select the OK button.
OR
Press TAB to move to the OK button and press ENTER.
Adding Alt Text to Images in Word
Hover over the image and right-click with the mouse.
OR
Select the image and open the context menu by pressing SHIFT + F10 or the APPLICATION key.
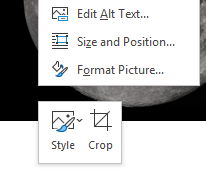
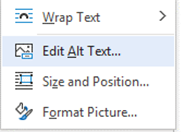
Select Edit Alt Text from the menu to open the Format Picture pane.
OR
Press A to select Edit Alt Text.
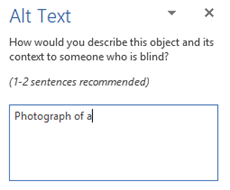
Type a short description of the image or its function in the Description box. See the Resource List for tips on authoring alternative text.
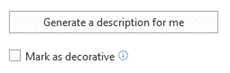
Check the Mark as decorative check box if the image adds no meaningful information to the document.
Generating automatic alt text is NOT recommended. This rarely generates an accurate or meaningful description for classroom learning.
Adding Alt Text to Images in Word Online
Click on the image to select it. When selected, the image will display resizing handles around its edges.
For keyboard users: Select the image by navigating to the image and pressing SHIFT + RIGHT ARROW.
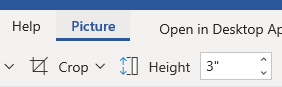
Click on the Picture ribbon near the top-right of the document window.
Keyboard users: Press WINDOWS + ALT to activate the ribbon and then J then P to select the Picture ribbon.
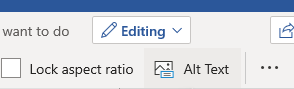
Click on the Alt Text button.
Keyboard users: Press TAB to move to the lower ribbon, then use the LEFT or RIGHT arrow keys to move to the Alt Text button and press ENTER.
Type a short description of the image or its function in the Description box. See the Resource List for tips on authoring alternative text.
Keyboard users: Press TAB once to move to the description edit field.
Adding Alt Text to Images in PowerPoint
Hover over the image and right-click with the mouse.
OR
Select the image and open the context menu by pressing SHIFT + F10 or the APPLICATION key.
Select Edit Alt Text from the menu to open the Format Picture pane.
OR
Press A to select Edit Alt Text.

Type a short description of the image or its function in the Description box. See the Resource List for tips on authoring alternative text.
Check the Mark as decorative check box if the image adds no meaningful information to the document.
Generating automatic alt text is NOT recommended. This rarely generates an accurate or meaningful description for classroom learning.
Adding Alt Text to Images in PowerPoint Online
Click on the image to select it. When selected, the image will display resizing handles around its edges.
For keyboard users: Select the image by navigating to the image and pressing SHIFT + RIGHT ARROW.

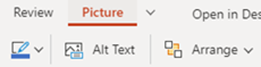
Click on the Picture ribbon near the top-right of the document window.
Keyboard users: Press WINDOWS + ALT to activate the ribbon and then J then P to select the Picture ribbon.
Click on the Alt Text button.
Keyboard users: Press TAB to move to the lower ribbon, then use the LEFT or RIGHT arrow keys to move to the Alt Text button and press ENTER.

Type a short description of the image or its function in the Description box. See the Resource List for tips on authoring alternative text.
Keyboard users: Press TAB once to move to the description edit field.