How-To Guides for Accessibility Checking
The guides on this page provide step-by-step instructions for using on-board accessibility checking features. Guides cover programs that are commonly used by educators to creating learning content in digital formats.
Steps are provided for users who interact with content using a mouse pointer as well as for those users who interact using keyboard commands.
Each guide appears in two formats - HTML and PDF. The PDF handout version is linked at the top of each corresponding accordion tab.
Checking Accessibility in Word Online
Select the Review ribbon at the top of the screen.
OR
Press CTRL + F6 until the ribbon receives focus and KeyTips appear. Press R for Review
Select the Check Accessibility button.
OR
From the Review ribbon, press Q to select the Check Accessibility button
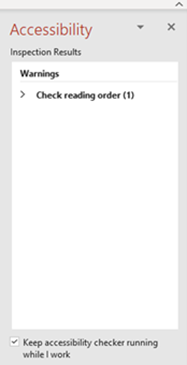
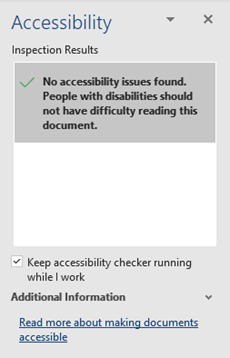
The Accessibility pane opens on the right-hand side of the screen.
Select a category to reveal or hide the specific issues underneath that category. Select an issue to have that item selected within the document.
OR
Use the UP and DOWN arrow keys to navigate the list of categories and issues. Use the RIGHT arrow to reveal items underneath a category and the LEFT arrow to hide items underneath a category. Press ENTER to select an item and press CTRL + F6 to cycle between the Accessibility pane and the document.
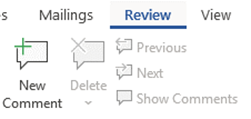
Checking Accessibility in Word
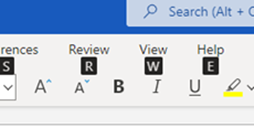
Select the Review ribbon at the top of the screen.
OR
Press ALT + R to select the Review ribbon.
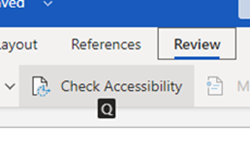
Select the Check Accessibility button and Check Accessibility from the menu.
OR
Press A then 1 to select the Check Accessibility menu. Press A again to access the Accessibility Inspection Results pane.

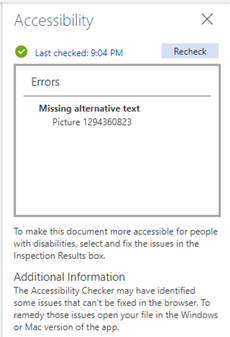
The Accessibility pane opens on the right-hand side of the screen.
Select a category to reveal or hide the specific issues underneath that category. Select an issue to have that item selected within the document.
OR
Use the UP and DOWN arrow keys to navigate the list of categories and issues. Use the RIGHT arrow to reveal items underneath a category and the LEFT arrow to hide items underneath a category. Press ENTER to select an item and press SHIFT + F6 and F6 to move between the Accessibility pane and the document.
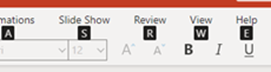
Checking Accessibility in PowerPoint Online
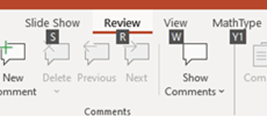
Select the Review ribbon at the top of the screen.
OR
Press CTRL + F6 until the ribbon receives focus and KeyTips appear. Press R for Review
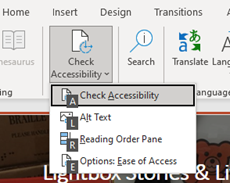
Select the Check Accessibility button.
OR
From the Review ribbon, press Q to select the Check Accessibility button.
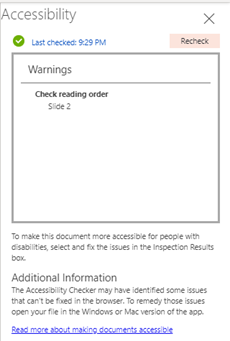
The Accessibility pane opens on the right-hand side of the screen.
Select a category to reveal or hide the specific issues underneath that category. Select an issue to have that item selected within the document.
OR
Use the UP and DOWN arrow keys to navigate the list of categories and issues. Use the RIGHT arrow to reveal items underneath a category and the LEFT arrow to hide items underneath a category. Press ENTER to select an item and press CTRL + F6 to cycle between the Accessibility pane and the document.
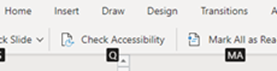
Checking Accessibility in PowerPoint
Select the Review ribbon at the top of the screen.
OR
Press ALT + R to select the Review ribbon.
Select the Check Accessibility button and Check Accessibility from the menu.
OR
Press A then 1 to select the Check Accessibility menu. Press A again to open the Accessibility Inspection Results pane.
The Accessibility pane opens on the right-hand side of the screen.
Select a category to reveal or hide the specific issues underneath that category. Select an issue to have that item selected within the document.
OR
Use the UP and DOWN arrow keys to navigate the list of categories and issues. Use the RIGHT arrow to reveal items underneath a category and the LEFT arrow to hide items underneath a category. Press ENTER to select an item and press SHIFT + F6 and F6 to move between the Accessibility pane and the document